As an Amazon Associate I earn from qualifying purchases.
Master the basics with this guide on knife skills for beginners – including the knives you need in your kitchen, how to use them, and the must-know knife cuts!
Why It’s Important to Learn Basic Knife Skills
Whether you’re new to the kitchen or finding that recipe prep consistently takes longer than expected because of all the chopping, it’s the perfect time to improve your knife skills with this simple guide to knife skills and knife cutting techniques.
Mastering knife cuts not only speeds up prep time but improves aesthetics and consistency and reduces the risk of injury. Keep reading to learn the 3 must-have knives in your kitchen, when and how to properly use them, and the top beginner knife cuts to feel kitchen confident.
The 3 Basic Knives You Need in Your Kitchen
- Chef’s knife: This is the main workhorse of your kitchen and is a long, wide, sharp blade (8-10 inches long though the Japanese version, Santokus, are 6-7 inches). Chef’s knife uses include chopping big/tough vegetables (like butternut squash and sweet potatoes), breaking down proteins, etc.
- Paring knife: These small knives (3-4 inches long) are more comfortable for smaller chopping jobs – like hulling and slicing strawberries, cutting eyes from potatoes, cutting garlic, and peeling apples.
- Serrated knife: (aka a bread knife). The sharp teeth along the long blade of this knife make it ideal for slicing cleanly through bread and cake and tough fruit (like watermelon/pineapple).
Want to build up your set? Our favorite affordable set is by Cuisinart and they are super affordable. If you’re looking to invest in a forever set, we really love this one.
Top Rules For Safe Knife Handling
- Use the right knife for the job: It makes cutting easier and safer.
- Keep knives sharp: Dull blades make it difficult to make precise cuts and require more effort, which leads to an increased risk of slipping and causing injury. If a blade is beginning to feel dull, use a knife sharpening tool.
- Use a cutting board: To help protect your work surfaces and keep knife blades sharp (cutting on hard surfaces can chip and dull the blades). If needed, stabilize the board by placing a damp cloth beneath it.
- Hold the knife safely: Make sure your grip on the handle is secure, and keep your fingers away from the blade. I recommend the ‘claw grip,’ which has you curl your fingertips under your hand, using your index or middle finger knuckle to guide the blade. This helps avoid accidental injuries.
- Hold the blade away from your body: This includes when cutting, washing, and drying it – that way, if it slips, it won’t cut you.
- Stabilize ingredients: If it is wobbling/sliding, slice/peel a thin section from one side so it sits flat. Slice large ingredients (like cabbage) into halves/quarters for stability.
- Don’t try to catch a falling knife: Or you risk serious injury.
How to Hold A Chef’s Knife
Handshake Grip
Grip the handle securely, similar to shaking someone’s hand. This is a firm grip, but not as controlled.
Avoid placing your index finger over the top of the blade (it may feel natural, but it isn’t stable and leads to hand fatigue).
Pinch Grip
Grip the handle close to the blade, similar to the handshake grip, except place your thumb and index finger (curled) on either side of the blade, just beyond the handle.
This grip has a great mix of strength and control (especially great for fine cuts).
The 7 Knife Cuts Every Home Chef Needs
Whenever you follow any recipe, you’ll notice the same few knife cuts mentioned repeatedly. These are the basic cutting skills I recommend every home chef to learn.
Slice (Rondelle)
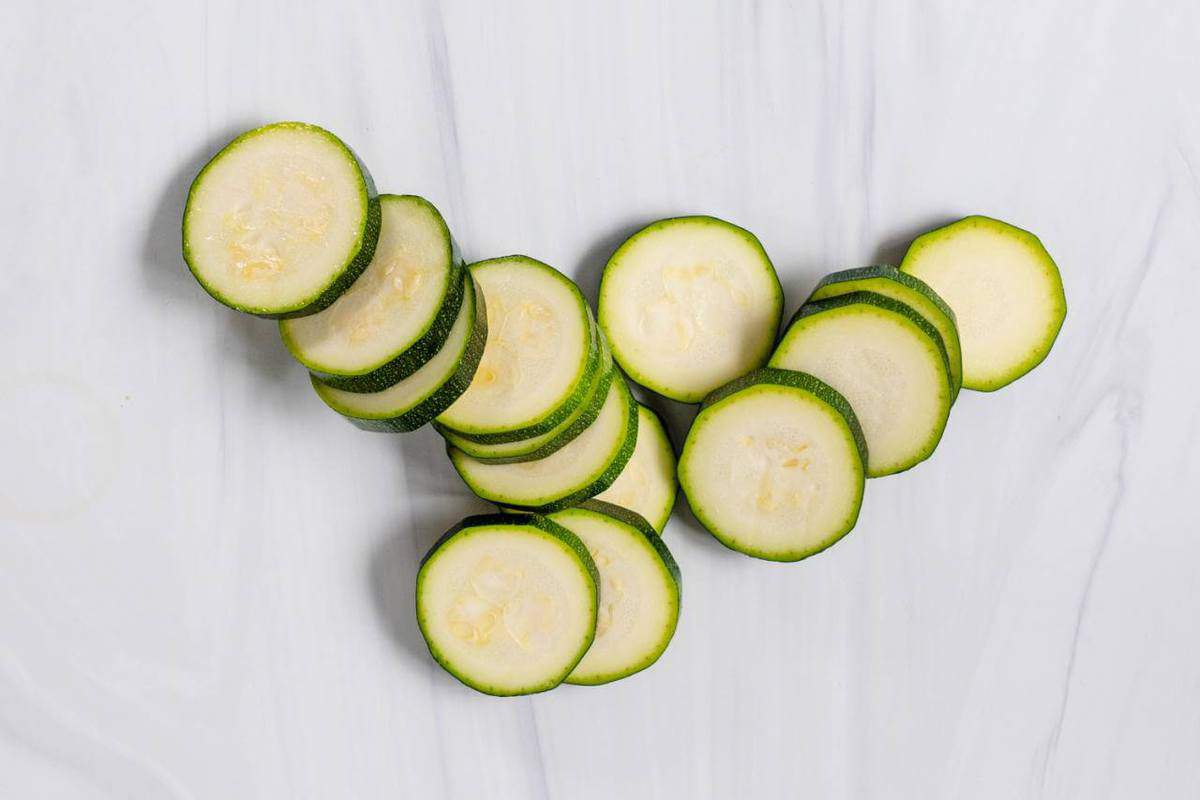
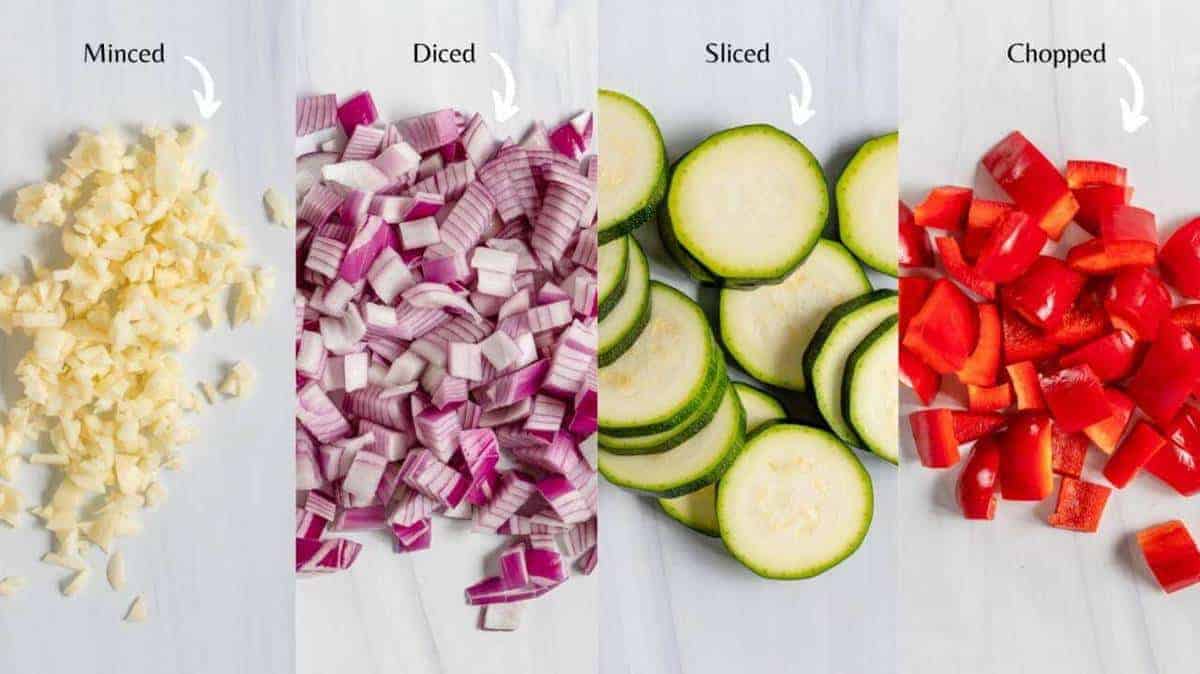
Slicing ingredients refers to creating round, coin-like pieces from ingredients like cucumbers, carrots, bananas, and zucchini. This works well for salads, roasting, and deep-frying.
How to Slice
- Wash, dry, and optionally peel the vegetable.
- Slice along the length of the ingredients to your desired thickness (usually between ⅛-½ inches). Move the knife in a rocking, tip-to-heel motion.
Slice on a bias (at a 45-degree angle) to create longer oval slices.
Dice
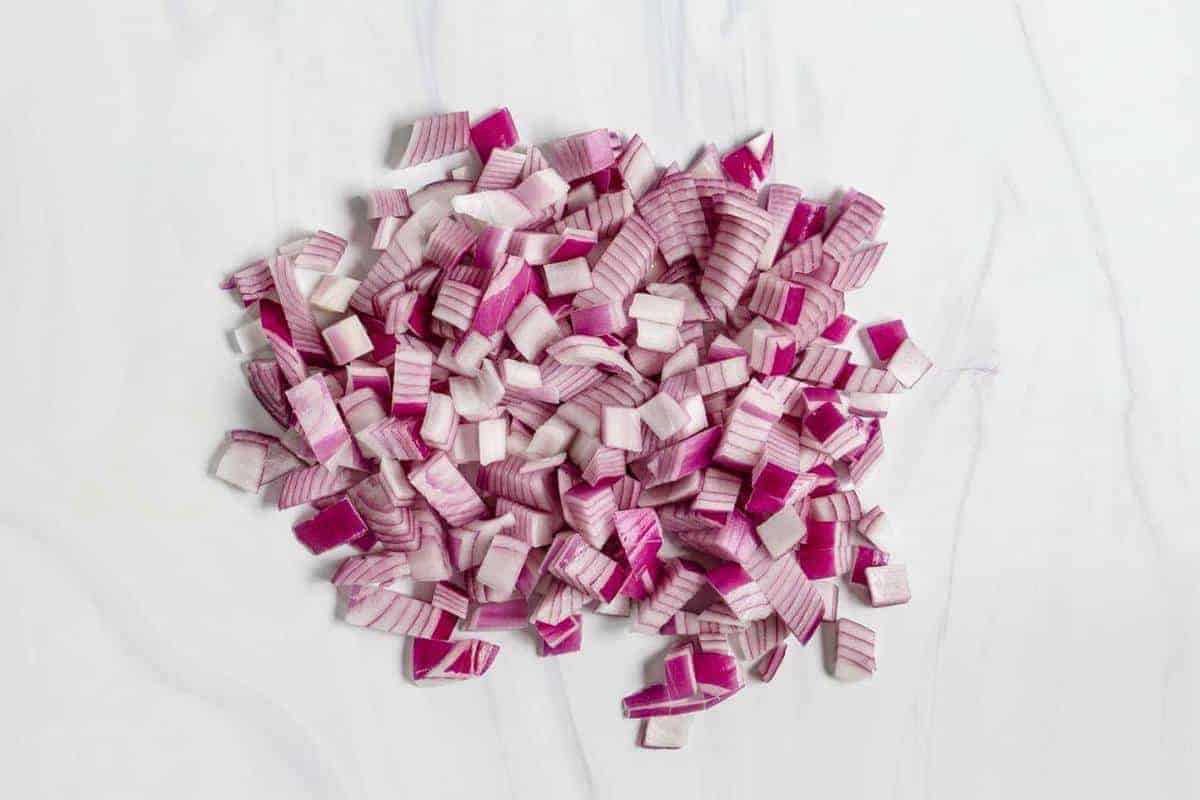
Dicing is one of the most used knife cuts, creating even-sized dice/cubes – usually largely diced (¾-1-inch cubes), medium diced (about ½-inch), or finely diced (¼-inch). This works great for soups, casseroles, salsa, etc.
How to Dice
- Wash, dry, and optionally peel the vegetable.
- Chop round slices as thick as you’d like your dice.
- Slice the rounds (usually stacking 2-3 to make it quicker) into batons of equal width.
- Bundle the batons, line up the edges, and slice horizontally into cubes.
How to Dice an Onion
Dicing onions is a slightly more unique technique because of its shape and layers.
- Using a chef’s knife, chop the onion in half through the root end, remove the outer peel, and trim ½-1 inch from the top, leaving the stem intact.
- Place one half flat-side down on the board and make several vertical cuts to the width of your desired dice without cutting through the root.
- Using one hand to hold the onion, slice 2-3 horizontal slices, parallel to the board, from base to root.
- Finally, slice the onion from the top, crosswise, to your desired dice size. Repeat with the other half.
Chop and Rough Chop
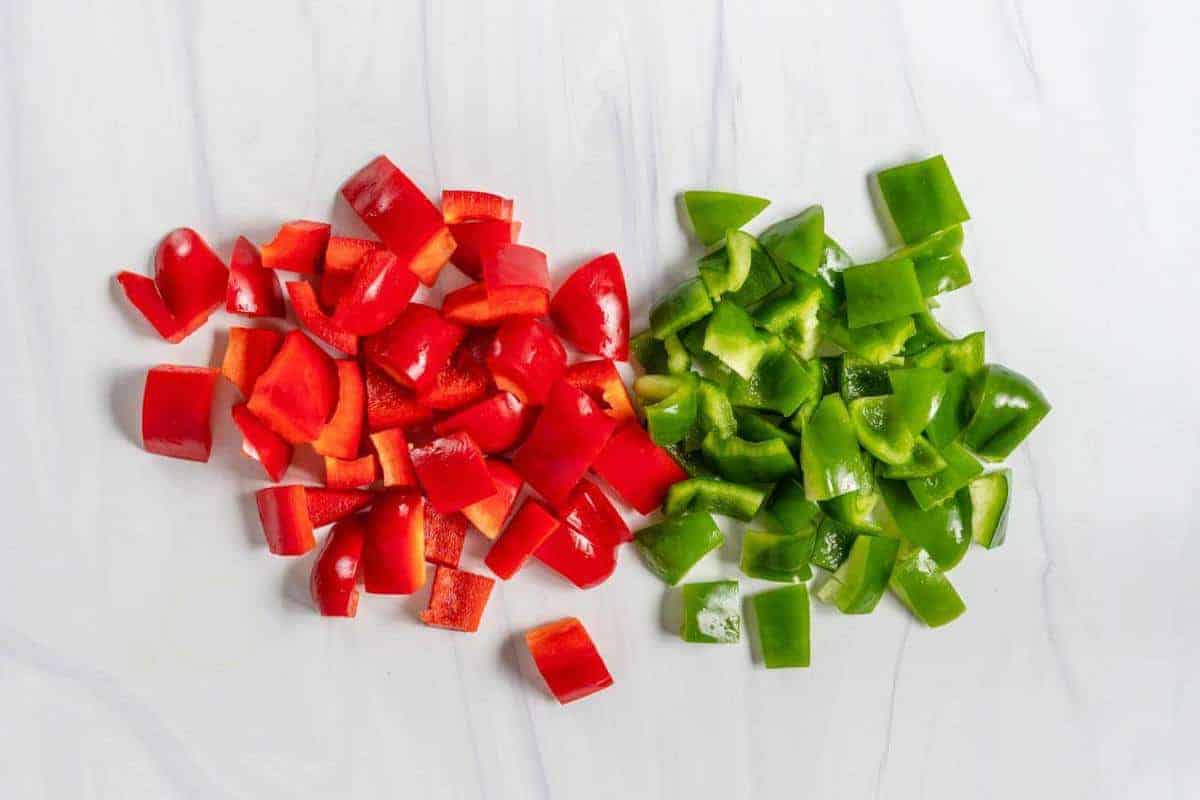
Chopping is similar to dicing but larger and/or less precise. This knife skill works well to save time/effort, especially when appearances aren’t important (like blended soups and sauces).
How to Chop
- First, wash, dry, and optionally peel the vegetable.
- Decide how large you want the pieces to be and slice then chop them into similar pieces.
Julienne
The julienne cut (aka matchsticks) is very thin, baton-like cuts– usually 2-3 inches long and 1/16-1/8th-inch thick. You usually julienne firm ingredients like carrots, apples, etc., to add to salads and stir-fries or make matchstick fries.
How to Julienne
- Trim any rounded edges to make a rectangle.
- Slice into 1/8-1/16th inch thick planks.
- Stack a few planks at a time and slice into 1/8-1/16 inch strips.
Thicker ¼-½ inch cuts in steps 2 and 3 will create ‘batons’ instead, perfect for charcuterie boards and homemade fries.
- Cut the strips down to size – 2 ½ inches makes regular matchsticks.
Brunoise
Brunoise comes from French, meaning ‘tiny cubes,’ and is the finest level of dicing chopping techniques. This is often used to distribute aromatics through soups, stews, and stocks.
How to Brunoise
- Start by cutting the ingredient julienne-style, 1/16th thick.
- Finely dice the julienne strips into 1/16th cubes.
Mince
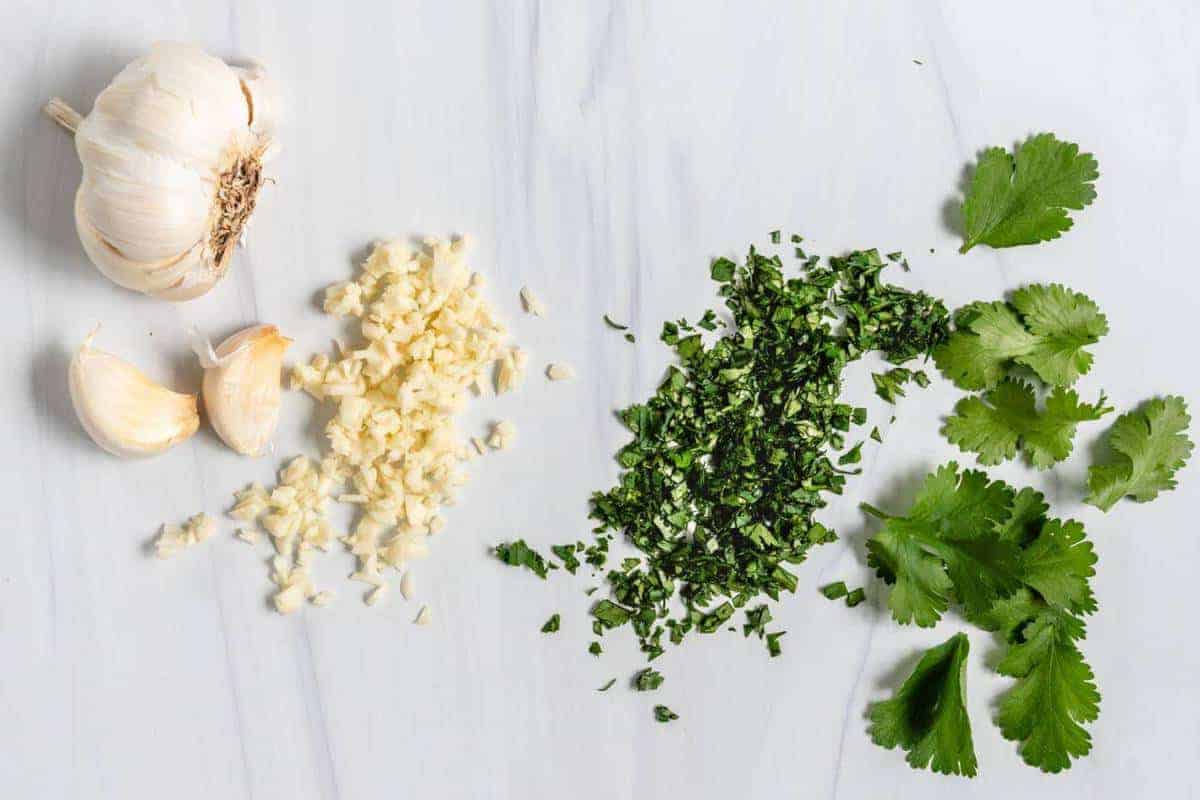
Mincing ingredients refers to a very fine dice/chop – often used with aromatic ingredients like garlic, ginger, and chili, to distribute them thoroughly and evenly throughout a dish.
How to Mince
- Start by cutting the ingredients into thin 1/16th inch julienne strips.
- Then, either brunoise (above) them first or immediately mince by holding the knife tip to the cutting board, a hand over the top (fingers outwards, away from the blade).
- Rock the knife back and forth in a semi-circular motion over the chopped pieces until it reaches your desired consistency.
Ribbon (Chiffonade)
Though this knife technique isn’t used in everyday usage, learning to ribbon can be helpful for leafy greens and aromatic herbs, creating thin and beautiful strips to garnish a dish.
How to Chiffonade
- Wash and dry the greens, removing tough stems if necessary.
- Layer a few leaves on top of each other.
- Tightly roll the stack and use your knife to slice across it for thin ribbons.

