This site uses affiliate links and I may earn a commission at no extra cost to you.
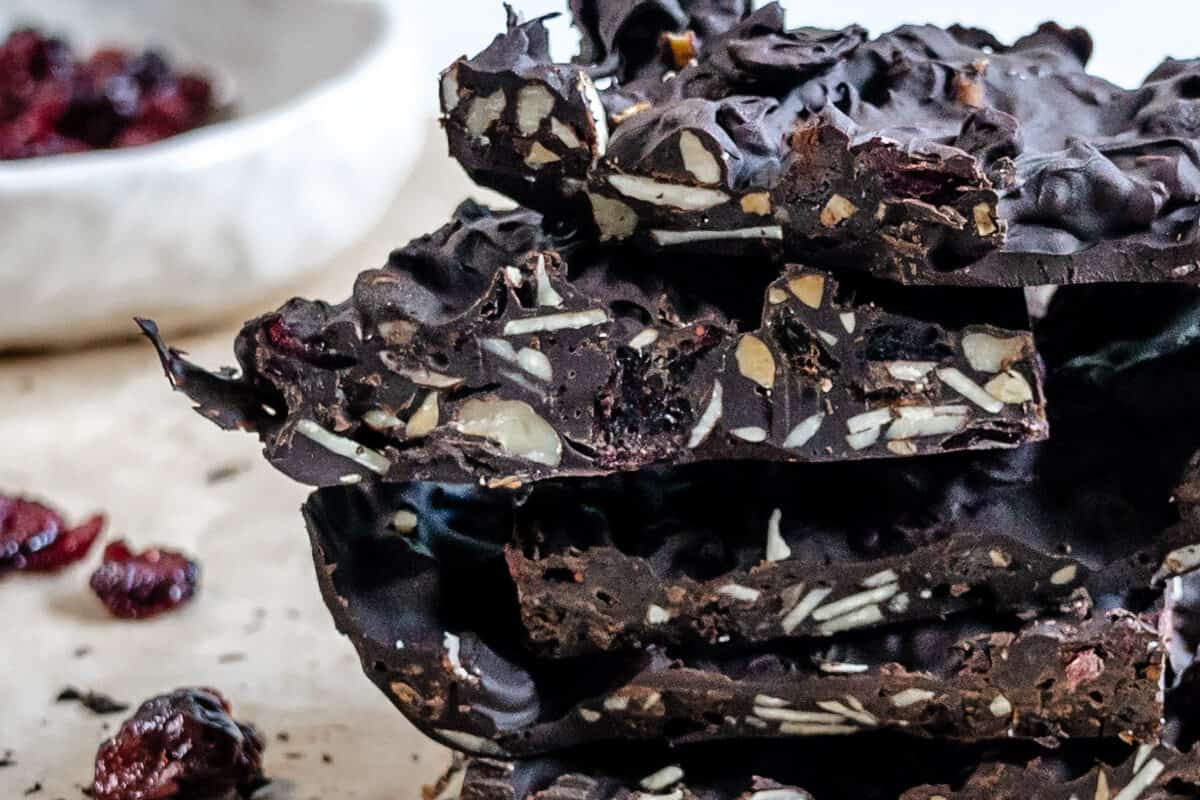
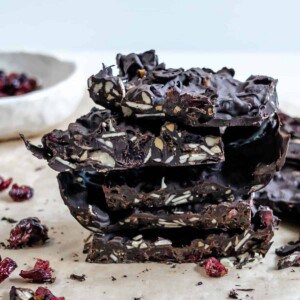
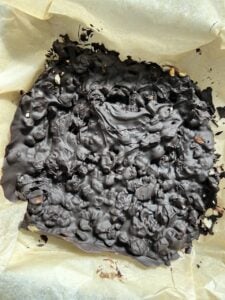
These homemade Chocolate Fruit Bars are filled with chewy dried fruits and crunchy nuts encased in rich, semi-sweet vegan chocolate. They are super easy to make and impressively budget-friendly!
Want to save this recipe?
Table of Contents
- Why You’ll Love this Chocolate Fruit Bar Recipe!
- Ingredients Needed for DIY Chocolate Fruit Bars
- How to Make Fruit and Nut Chocolate Bars
- Toni’s Tips for Making Chocolate Fruit Bars
- Serving Suggestions
- Storage Instructions
- FAQs for DIY Chocolate Bar
- More Sweet Treats You Can Make at Home!
- Chocolate Fruit Bars Recipe
Why You’ll Love this Chocolate Fruit Bar Recipe!
If you love to indulge in rich fruit and nut chocolate bars, but want a budget-friendly option, I’ve got the ticket! These chocolate fruit bars (or chocolate bark with nuts) are so quick and easy to make and perfectly satisfy the sweet & chocolate craving.
My chocolate fruit bar recipe only requires 4 ingredients and 15 minutes to get them ready for the freezer. No cooking or baking is required! All you have to use is your microwave. Plus, you can add as many dried fruits and nuts as you want – making them even healthier! Even better, you can make a big batch of these and freeze them. That way you have a yummy treat whenever the craving hits! They also make great gifts.
Ingredients Needed for DIY Chocolate Fruit Bars
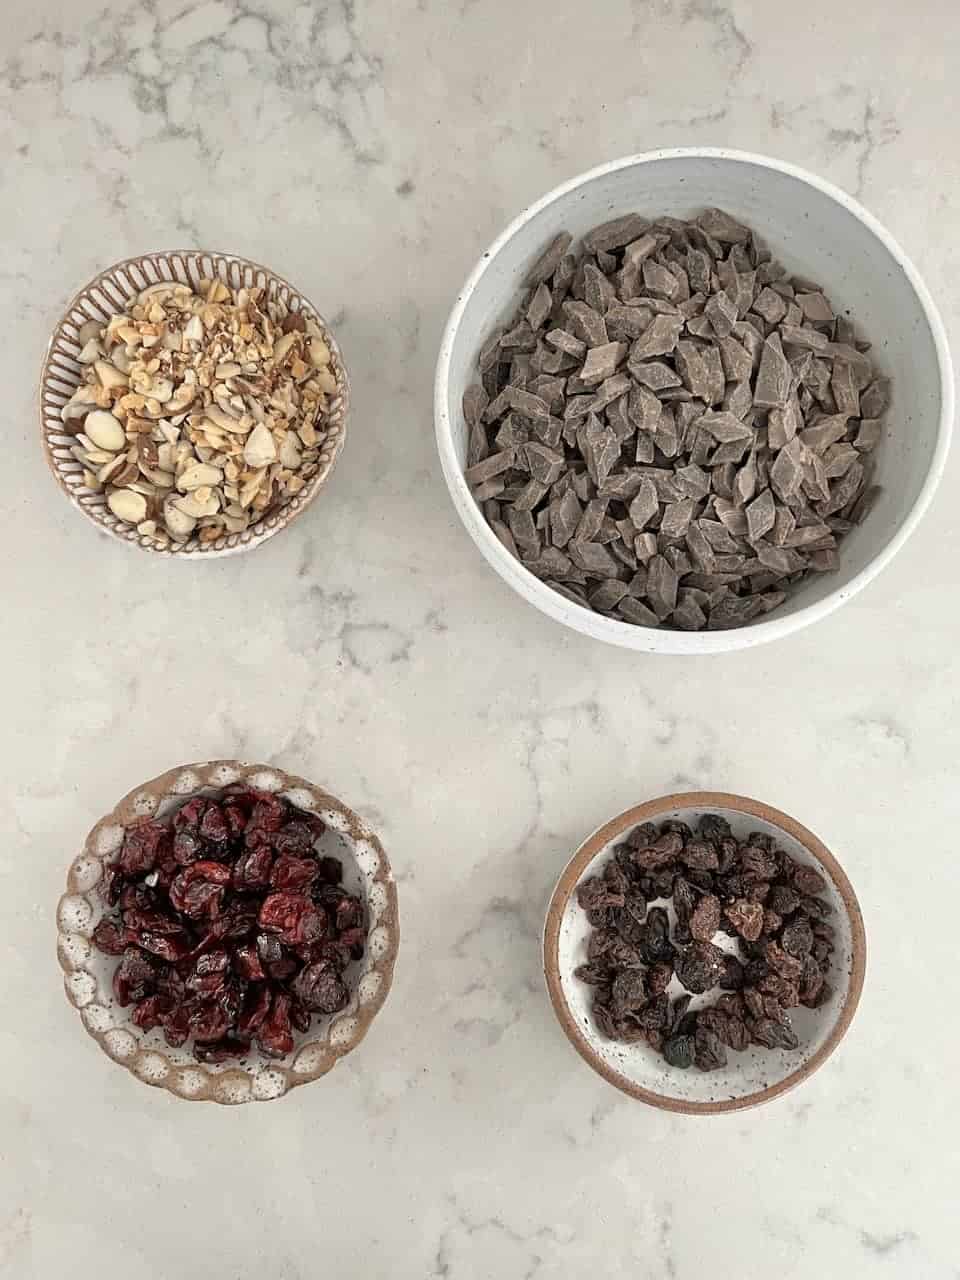
- Vegan chocolate chips: I used non-dairy semi-sweet for this recipe. You can also use vegan dark chocolate if you prefer. Make sure to use a quality brand for the best results.
- Dried cranberries: These sweet and tarty treats are full of fiber, vitamins, and antioxidants. The chewy texture is perfect with crunchy nuts and smooth non-dairy chocolate.
- Mixed nuts: The sky’s the limit! You can choose your favorite nuts like almonds, walnuts, pistachios, macadamia, and many more. These will give the vegan chocolate bar crunch and pops of savory and salty flavors.
- Raisins, dried apricots, or your favorite dried fruit: You can pick and choose what you add to this chocolate bark, depending on what is available and what you enjoy!
How to Make Fruit and Nut Chocolate Bars
Preparation:
- Line a 9 x 9 pan with parchment paper.
- Chop the nuts and dried fruits into smaller pieces.
Steps:
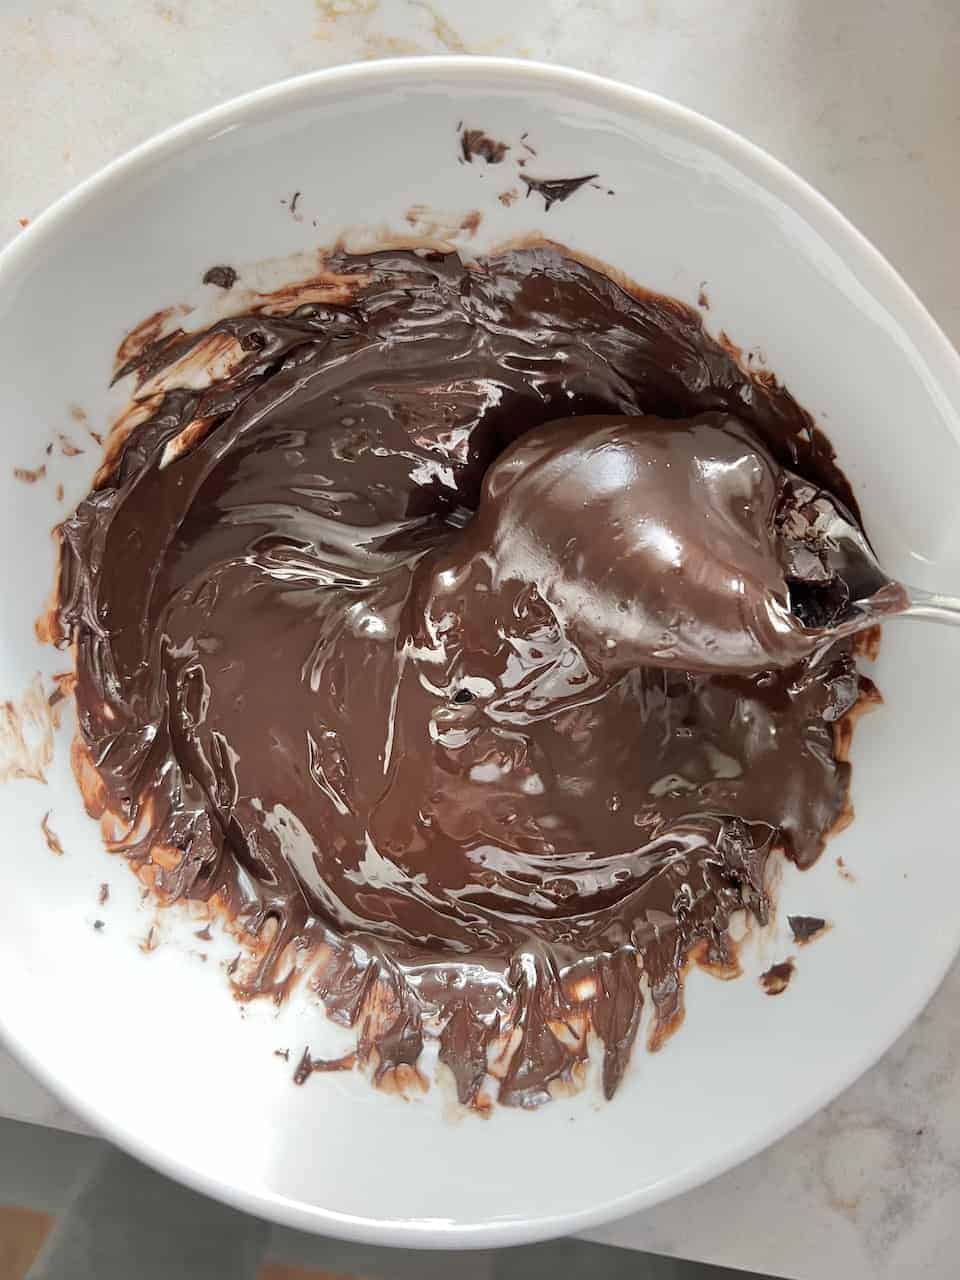
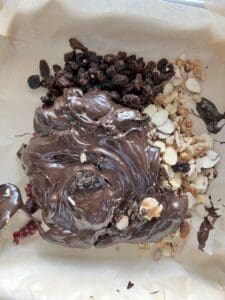
Step 1: First, melt the vegan chocolate. Place the non-dairy chocolate chips in the microwave for 1.5 minutes or until completely melted. Here’s a guide for how to do it.
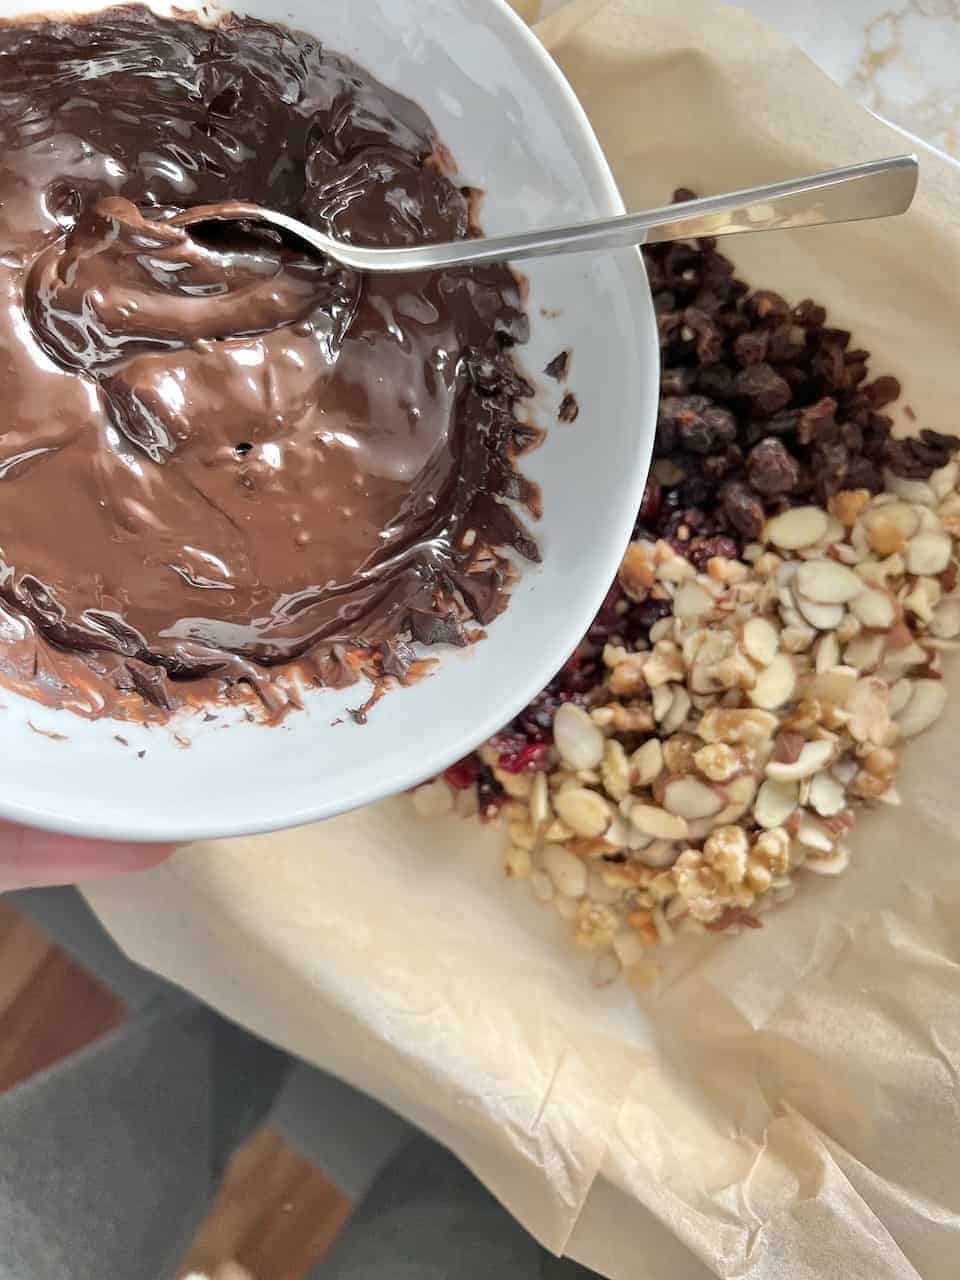
Step 2: Next, mix it up. Stir in the dried fruits and your favorite chopped nuts. Then, make sure they are completely coated with the melted vegan chocolate.
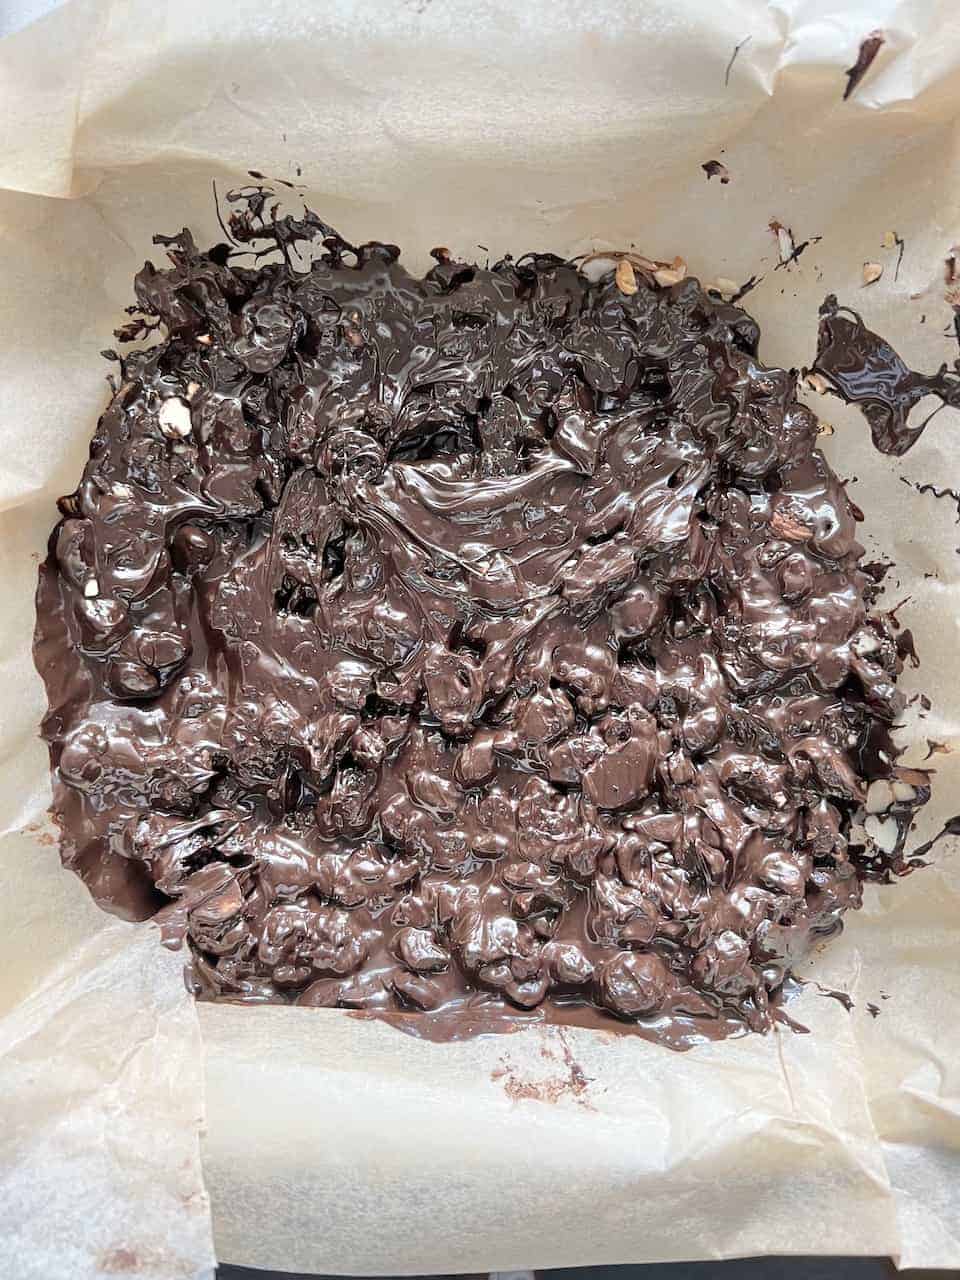
Step 3: Once mixed, pour the vegan chocolate mixture into the prepared pan and spread it evenly. Then, place the pan with the vegan chocolate fruit mixture in the freezer for 30 minutes.

Step 4: Once fully hardened, slice the bars to serve them. You can cut or break them into bars or chunks.
Toni’s Tips for Making Chocolate Fruit Bars
- Melt chocolate on the stove: If you do not have a microwave, you can place the vegan chocolate chips in a small bowl, then put it on top of a bigger bowl filled with hot water. Stir until the chips are fully melted.
- Release air bubbles: Tap the pan a few times on the counter to remove any air bubbles for a smoother vegan chocolate bar.
- Heat knife for easy slicing: After freezing, slice them neatly into bars by using a heated knife. Just place the knife under hot water for a few seconds, wipe and cut.
- Try seeds instead of nuts: If you are allergic to nuts, you can omit them and use sunflower or pumpkin seeds instead. You can also add rolled or quick oats, crunchies or coconut flakes for more texture too.
- Use seasonal fruits: Use seasonal dehydrated fruits to save more money.
- Decorate seasonally: You can easily decorate the non-dairy chocolate bars to fit any occasion and party. Add some green sprinkles for St. Patrick’s day, heart decors for Valentine’s day or Mother’s day, or some peppermint candies for Christmas.
Serving Suggestions
Looking for more healthy snacks and treats to keep in rotation or to share with friends?
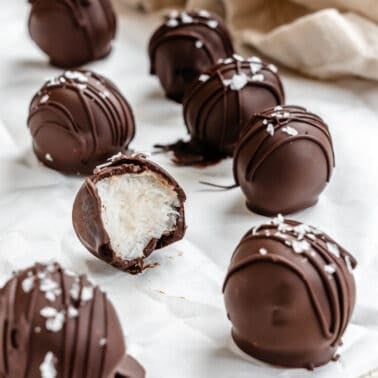
- Chocolate Dipped: Melt more chocolate for a feast (or some freezer prepping!) of chocolate coconut balls, peanut clusters, chocolate covered strawberries, or peanut butter cracker sandwiches. Combine a few of those for an extra-special gift-bag or basket, perfect for teacher gifts, co-workers, and gym friends!
- Sweet Treats: Make a dessert tray to share (or keep for yourself!) with chocolate chip banana bites, Biscoff fudge, peanut butter stuffed dates, and/or chocolate crinkle cookies.
- Savory Bites: Switch up the snacking with chai spiced popcorn, easy cucumber bites, or bagel bites.
Storage Instructions
These delicious vegan chocolate fruit bars can be stored in the fridge for up to a week or in the freezer for up to two months. So make several pans in one go, and enjoy them anytime you like. Separate the bars with parchment or wax paper, so they do not stick together, and then keep them in an airtight container in the fridge.

FAQs for DIY Chocolate Bar
Yes, you can! To melt the plant-based chocolates, use a double broiler. The vegan chocolate will slowly melt by the steam from the boiling water, preventing it from burning.
It’s possible that removing them from the freezer too soon is a factor. Second, fruits may not be adequately coated in non-dairy chocolate, causing them to crumble and fall apart. Finally, there is not enough binder. I’d recommend picking dried fruits that are a little sticky, such as dates, to help them bind together.
Yes, of course. This recipe is so adaptable that you can make your own snack bars using whatever you want. Vegan dark chocolate, in fact, is the most vegan-friendly alternative and makes it healthier.
More Sweet Treats You Can Make at Home!

Vegan Desserts
Peanut Butter Chocolate Bark

Vegan Desserts
Chocolate Covered Peanut Butter Balls (+ Add-Ins)
Vegan Desserts
Chocolate Dipped Peanut Butter Cracker Sandwiches
Vegan Desserts
3-Ingredient Chocolate Coconut Balls
If you tried this chocolate fruit bars recipe or any other recipe on my blog, please leave a 🌟 star rating and let me know how it went in the 📝 comments below. Thanks!
Photos by Alfonso Revilla

If you’re loving my recipes and would like a more comprehensive resource, check out my cookbooks!
Chocolate Fruit Bars
Want to save this recipe?
Ingredients
- 12 ounces of non-dairy semi-sweet chocolate chips
- ½ cup of dried cranberries
- ½ cup of mixed nuts chopped
- ¼ cup of raisins dried apricots, or your favorite dried fruit, chopped
Instructions
- In a microwave-safe bowl, microwave chocolate chips for 1 ½ minutes or until melted.

- Add dried fruit and chopped nuts and mix thoroughly.
- Line a 9 x 9 pan with parchment paper, and the melted vegan chocolate mixture and spread evenly. Put the pan in the freezer for half an hour, cut into bars and enjoy.

Notes
- Melt chocolate on the stove: If you do not have a microwave, you can place the vegan chocolate chips in a small bowl, then put it on top of a bigger bowl filled with hot water. Stir until the chips are fully melted.
- Release air bubbles: Tap the pan a few times on the counter to remove any air bubbles for a smoother vegan chocolate bar.
- Heat knife for easy slicing: After freezing, slice them neatly into bars by using a heated knife. Just place the knife under hot water for a few seconds, wipe and cut.
- Try seeds instead of nuts: If you are allergic to nuts, you can omit them and use sunflower or pumpkin seeds instead. You can also add rolled or quick oats, crunchies or coconut flakes for more texture too.
- Use seasonal fruits: Use seasonal dehydrated fruits to save more money.
- Decorate seasonally: You can easily decorate the non-dairy chocolate bars to fit any occasion and party. Add some green sprinkles for St. Patrick’s day, heart decors for Valentine’s day or Mother’s day, or some peppermint candies for Christmas.


![completed EASY Chocolate Depression Cake [Wacky Cake] sliced against a white surface](https://plantbasedonabudget.com/wp-content/uploads/2023/01/36-Crazy-Cake-Plant-Based-on-a-Budget-1-2-378x378.jpg)