This site uses affiliate links and I may earn a commission at no extra cost to you.
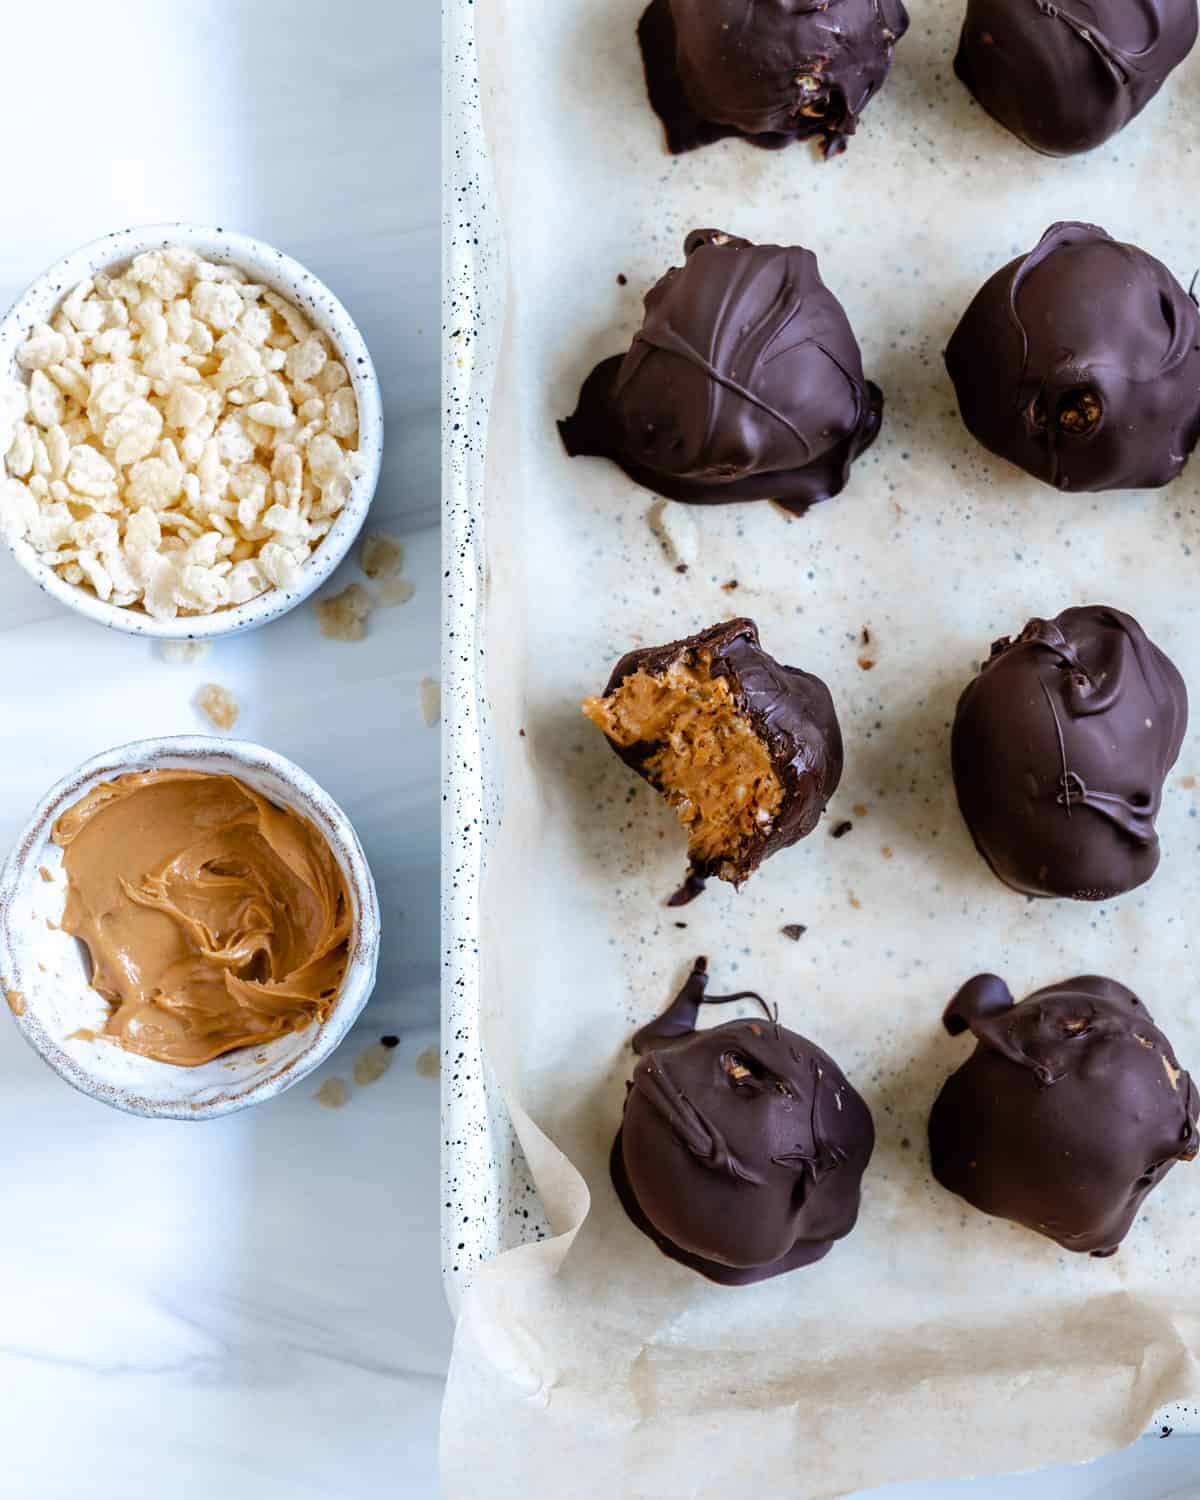
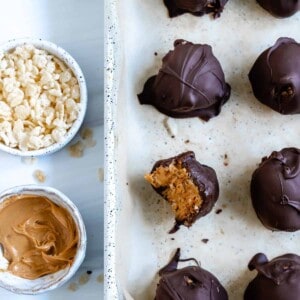
These vegan chocolate peanut butter balls with Rice Krispies are an easy, no-bake, 4-ingredient and absolutely addicting treat. AKA peanut butter bon bons, these delicious bites are crunchy, creamy, and slightly chewy! Even better, they are naturally dairy-free. They can also be prepared gluten-free or keto for a healthy, sweet and salty snack or dessert!
Want to save this recipe?
Table of Contents
- Why You’ll Love This Vegan Chocolate Peanut Butter Balls With Rice Krispies Recipe
- Ingredients for No-Bake Chocolate Peanut Butter Ball Ingredients
- How to Make Chocolate Peanut Butter Balls?
- Toni’s Recipe Tips and Notes
- FAQs
- Serving Suggestions
- Storage Instructions
- More Easy Vegan Peanut Butter Recipes:
- Vegan No-Bake Chocolate Peanut Butter Balls With Rice Krispies (Peanut Butter Bon Bons) Recipe
Why You’ll Love This Vegan Chocolate Peanut Butter Balls With Rice Krispies Recipe
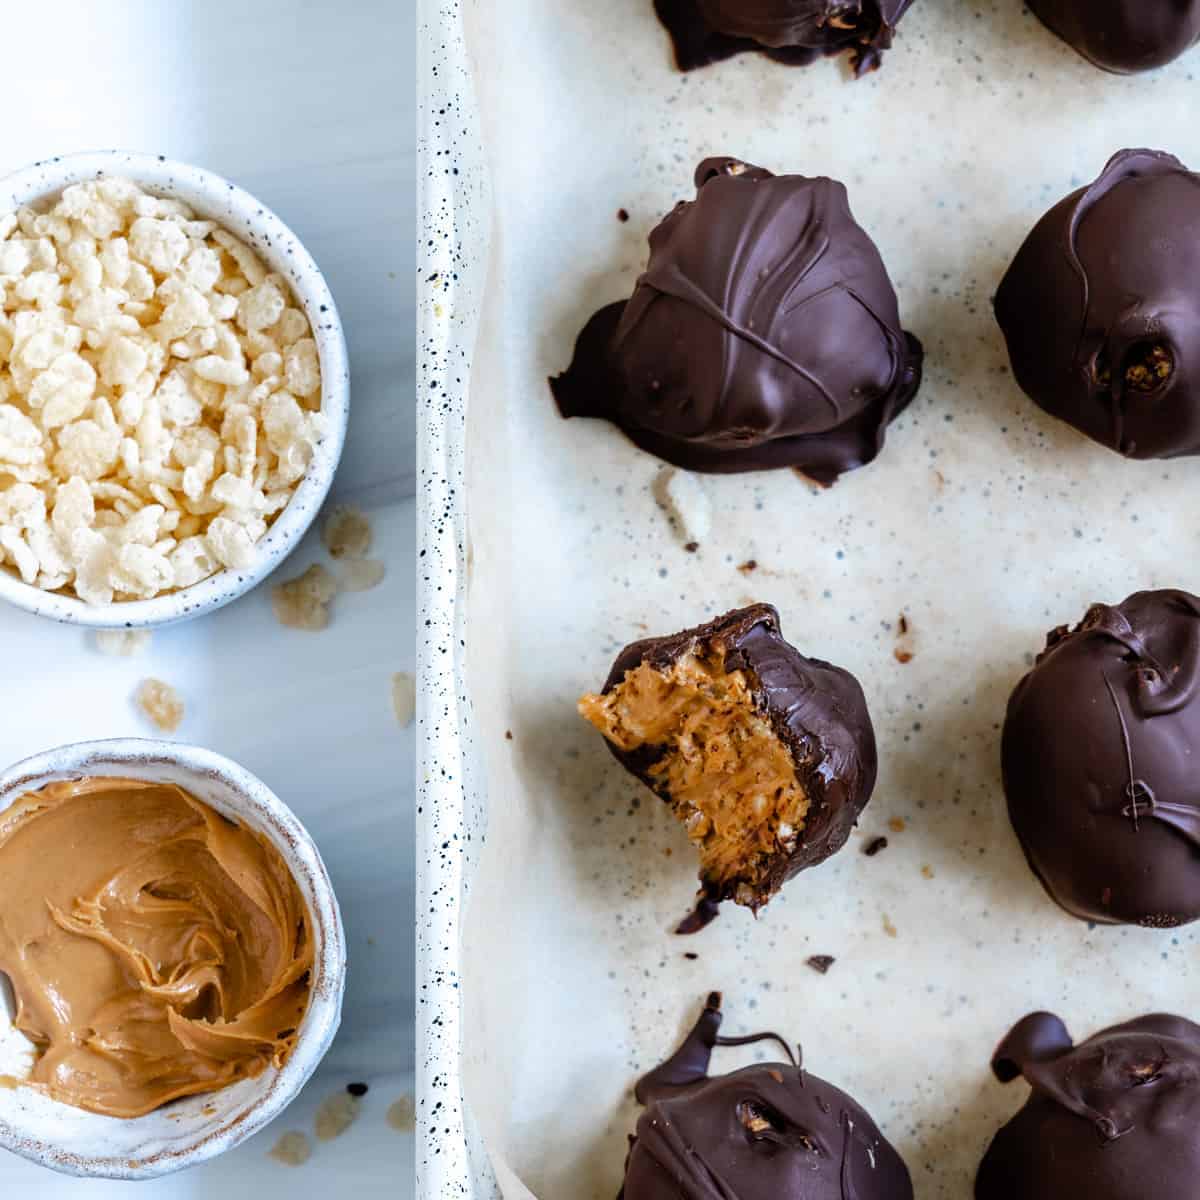
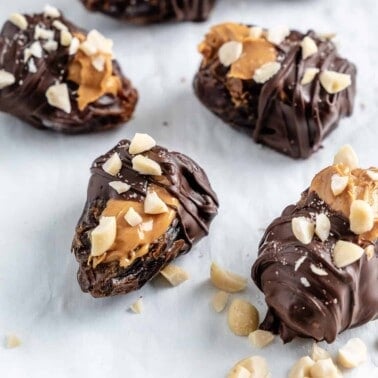
These chocolate peanut butter bon bons have it all! A decadent chocolate coating, creamy peanut butter to give a boost of protein and healthy fats, and crispy puffed rice cereal for texture and a hint of sweetness.
You may know these delicious treats by another name: vegan peanut butter truffles, peanut butter bon bons, chocolate peanut butter balls, or even Buckeye balls (when coating only ¾ way with chocolate). But by any other name, they’re still as sweetly addicting and satisfying.
Plus, this indulgent bite-sized snack is so easy to make and also budget-friendly. This makes it a no-brainer for an afternoon pick-me-up when the sugar cravings strike. Also, for adding to lunch boxes, or serving at parties or potlucks. (Although, be warned: these crowd-pleasing no-bake peanut butter balls disappear in minutes!) If you can manage to make them last, these vegan chocolate peanut butter balls also store well in the fridge and freezer!
Can’t get enough of that amazing chocolate and peanut butter combo? Make some peanut butter cracker sandwiches, chewy granola bars, or chocolate-covered trail mix peanut butter balls. Also chocolate peanut butter pretzel bars or no-bake peanut butter cups!
Ingredients for No-Bake Chocolate Peanut Butter Ball Ingredients
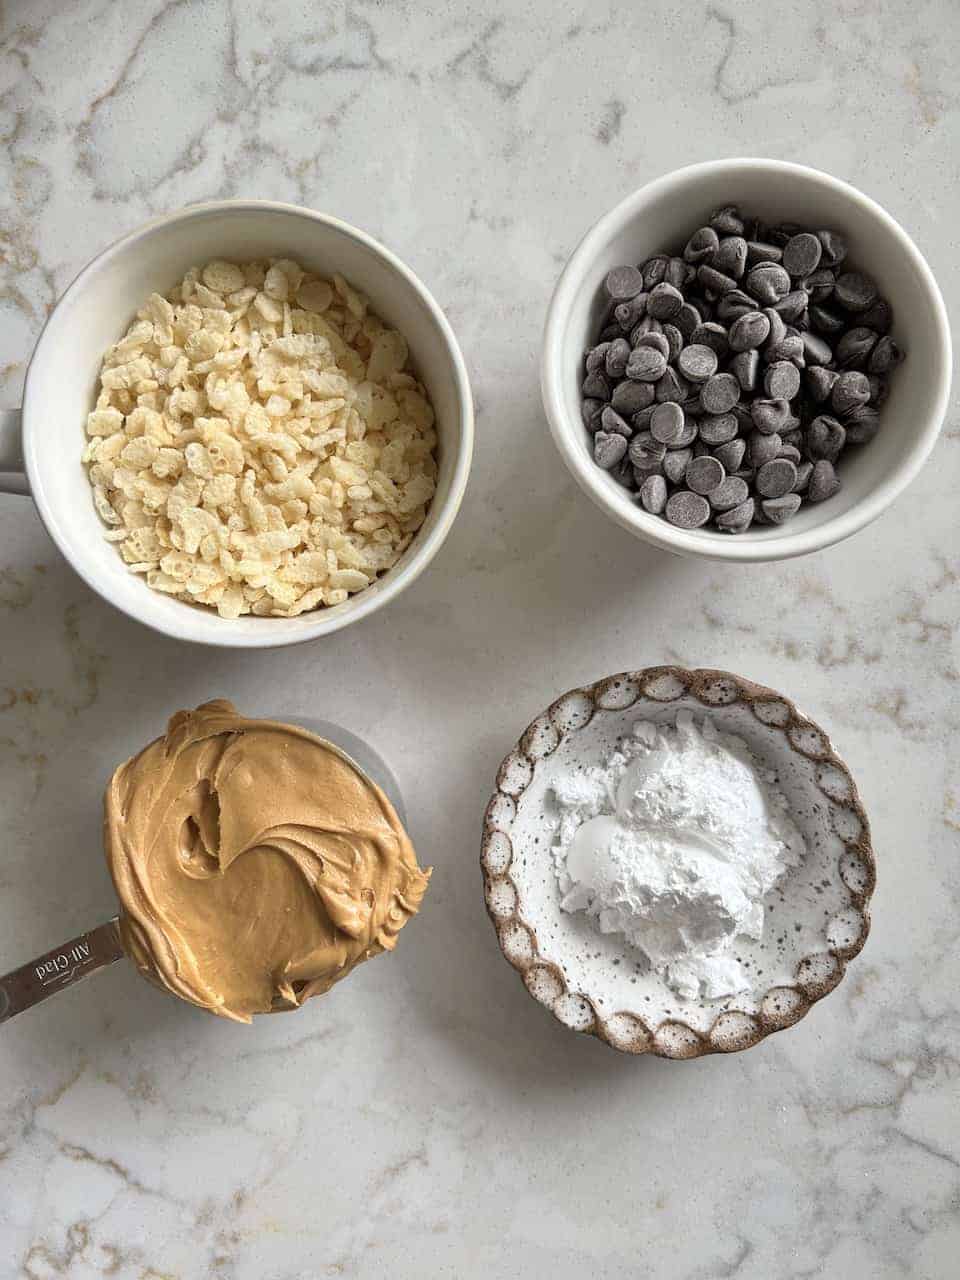
The 4-ingredient peanut butter balls require just a few simple pantry staples!
- Peanut butter: I recommend using creamy peanut butter for these vegan peanut butter truffles. Avoid natural peanut butter where oils have separated and are sitting at the top of the jar.
- Puffed rice cereal: Rice Krispies aren’t actually vegan (or gluten-free)! However, there are many brands of puffed rice cereal that you can use for these vegan peanut butter balls (including most of the generic unbranded versions of Rice Krispies). You can also use chocolate-flavored crispy rice cereal or potentially puffed quinoa. Though I haven’t tried the latter, and it will be pricier (but a higher protein content!).
- Powdered sugar: You can use regular powdered sugar or a sugar-free option like powdered erythritol. If you want to avoid extra sweetness entirely, you could experiment with thickening the peanut butter mixture with either oat flour or coconut flour (or a combination of the two).
- Chocolate: I used dairy-free semi-sweet chocolate chips. However, any high-quality (with cocoa butter rather than palm oil/other fats/oils) dairy-free chocolate (vegan milk, semi-sweet, bitter-sweet) should work. Use keto-approved (sugar-free) chocolate if preferred.
If you struggle with the chocolate melting to the correct dipping consistency (which shouldn’t be an issue when using high-quality chocolate), you could add a tablespoon or so of coconut oil or vegetable shortening to help make it more smooth. Here’s a guide to How to Melt Chocolate that you might find handy also!
Optional Add-ins & Recipe Variations
- Vanilla extract: Use natural vanilla extract for the best flavor. Just a few drops will enhance the flavor of these peanut butter bon bons.
- Sea salt: If the peanut butter you use is unsalted, you may want to add a pinch to enhance the flavors. You can also sprinkle each vegan chocolate peanut butter truffle with a bit of flaky sea salt. They’ll look beautiful, have a little crunch, and taste great!
- Graham crackers: Instead of using puffed rice cereal, you could create chocolate peanut butter balls with crushed graham crackers.
- Peanut butter protein balls: Instead of the powdered sugar or flours mentioned above, you could thicken the peanut butter mixture with your favorite plain or vanilla protein powder. The chocolate peanut butter protein balls make for an excellent pre or post-workout snack!
- Omit the chocolate: If you’d prefer your crunchy peanut butter balls to be chocolate-free, no problem! Just skip that step.
- Crunchy Buckeye balls: Use a toothpick and make sure to only dip the chocolate Buckeyes 3/4 of the way into the chocolate.
- Gluten-free chocolate peanut butter balls: Just make sure to use a crispy puffed rice cereal that’s labeled gluten free. Rice Krispies (and some other brands) use malt flavor, which is not gluten free.
- Optional toppings: There are several toppings you could choose to sprinkle over or roll the vegan peanut butter truffles into. These include shredded coconut, chopped nuts, freeze-dried Berry powder or pieces, cookie crumbs, etc. You could also use a vegan white chocolate or dark chocolate drizzle.
How to Make Chocolate Peanut Butter Balls?
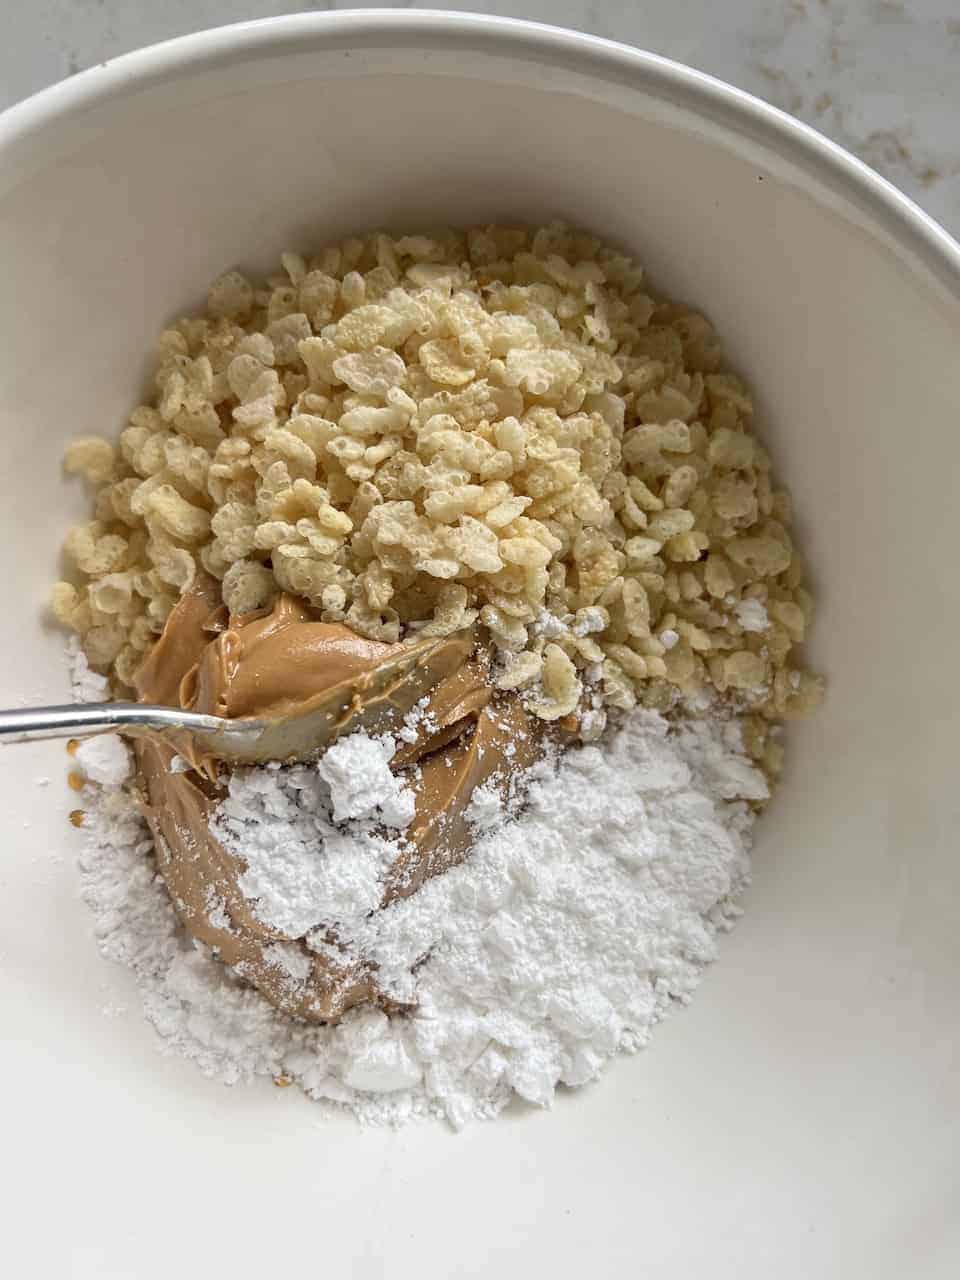
Step 1: First, in a large mixing bowl, combine the peanut butter, powdered sugar (or flour), and puffed rice cereal (whole or lightly crushed). Then, mix well until a kind of rollable dough has formed.
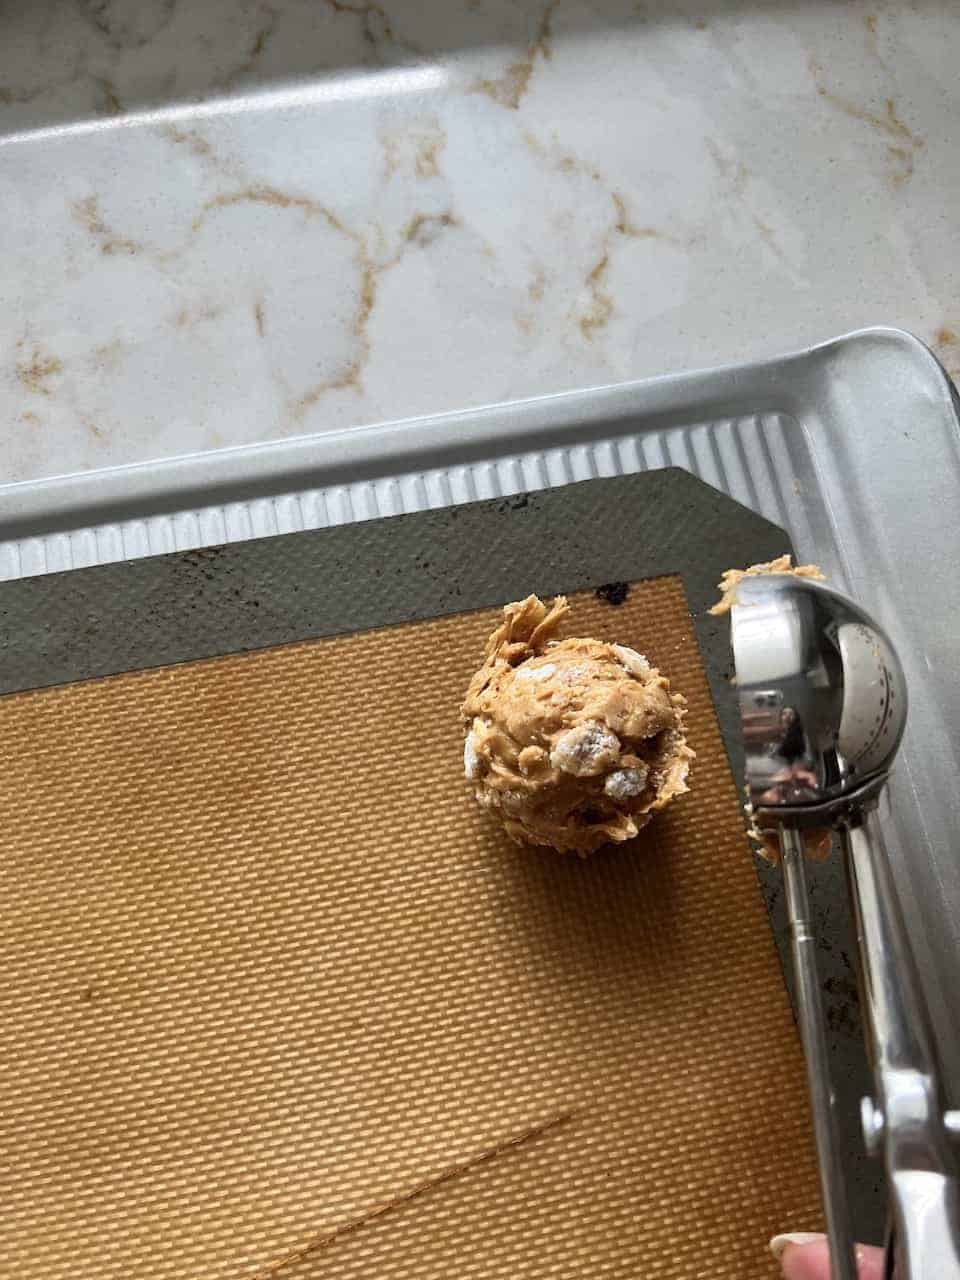
Step 2: Next, using either a small cookie scoop or melon baller, scoop the mixture into small 1-inch balls. Then gently roll to smooth the shape. Place them onto a wax paper or parchment paper-lined baking sheet. Once they are all rolled, transfer the tray to the freezer to set for 15 minutes until hard.
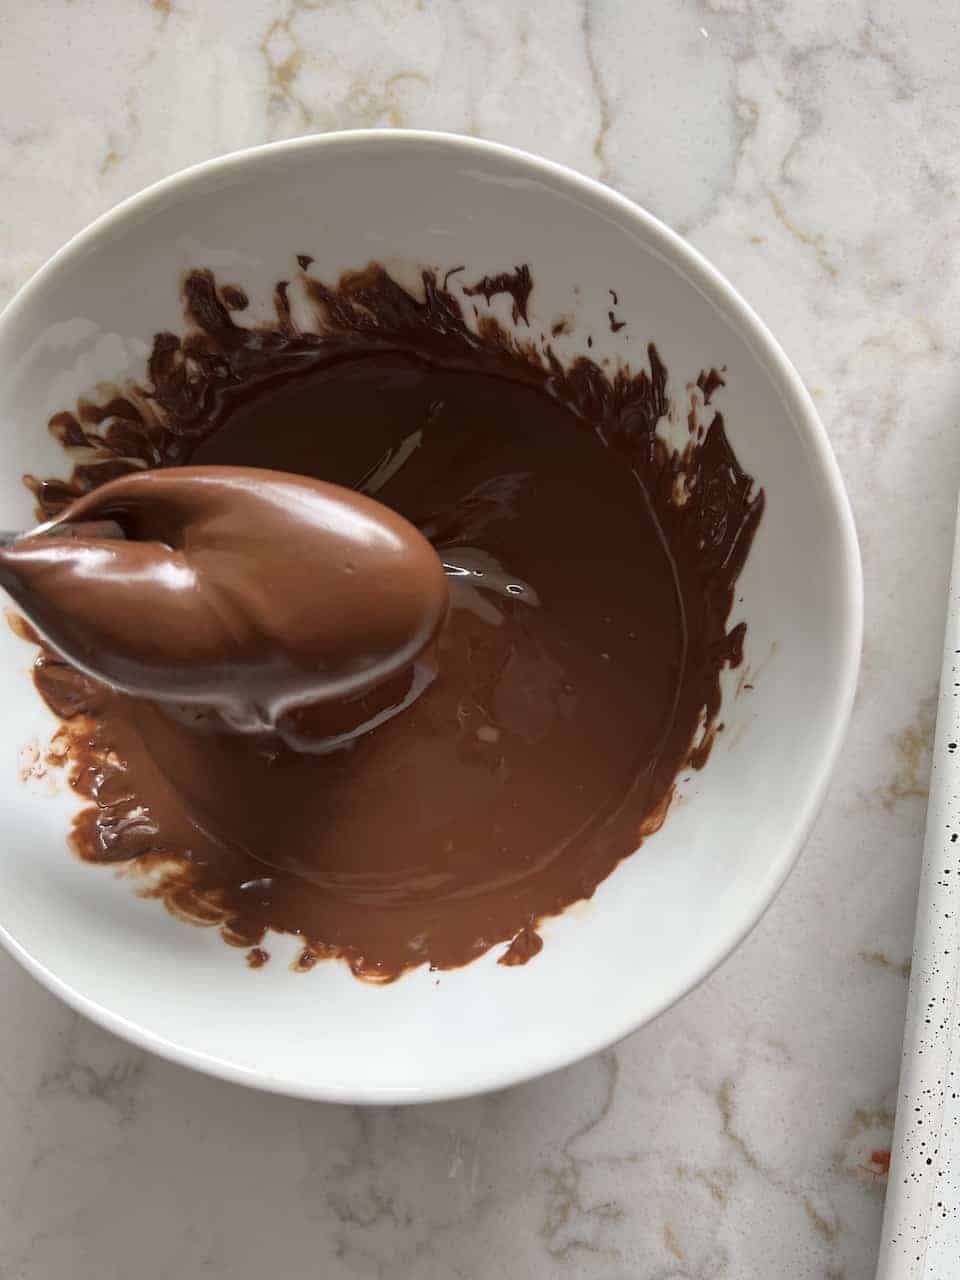
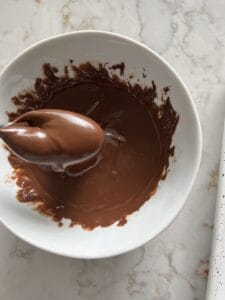
Step 3: Once they are ready to dip, melt your vegan chocolate either using a double boiler or in the microwave.
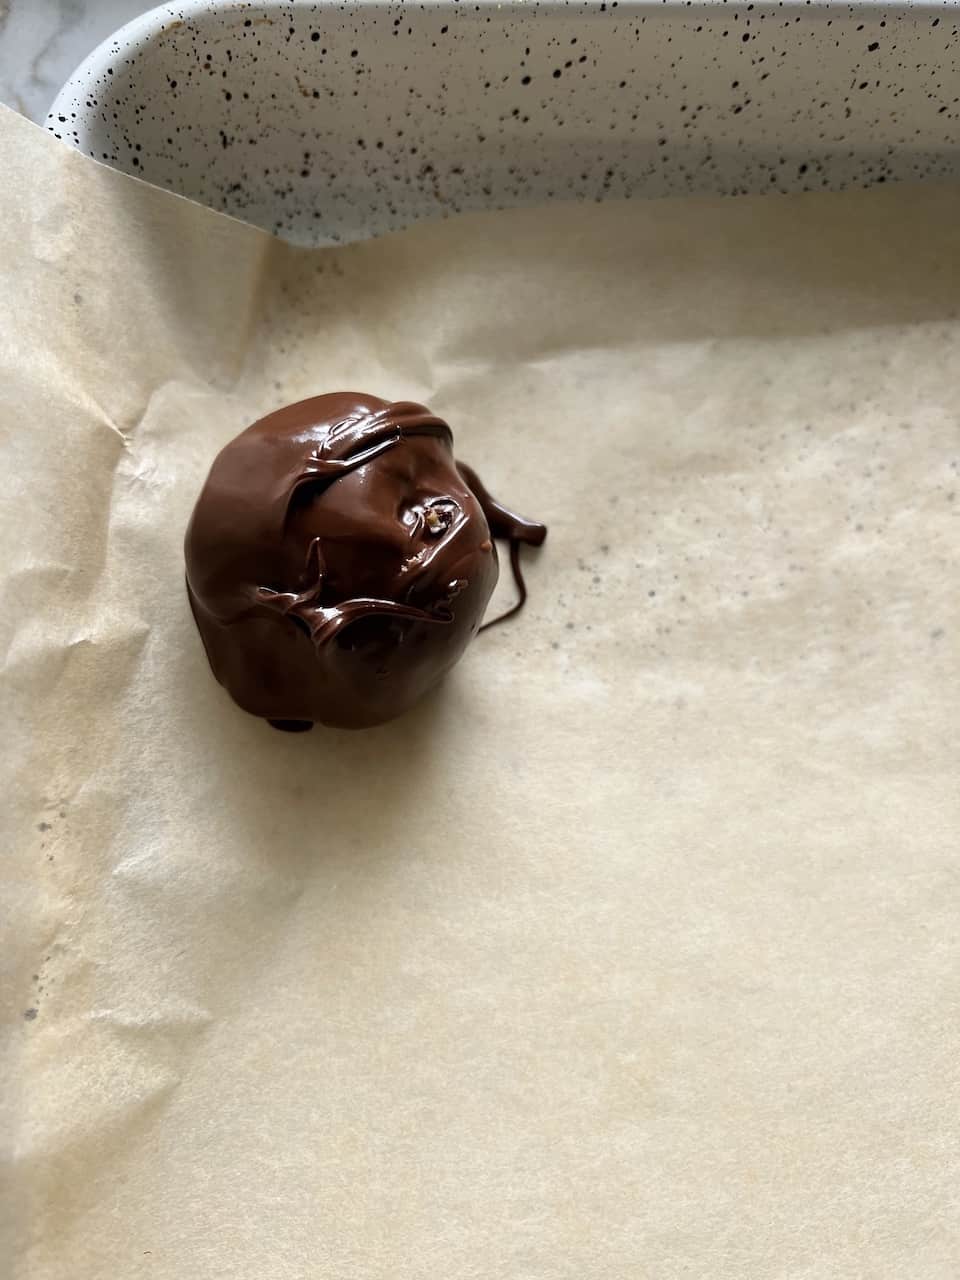
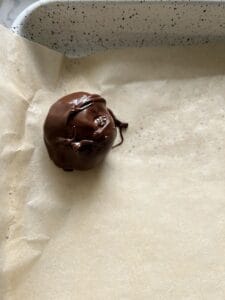
Step 4: After that, dip each of the peanut butter bon bons into the melted chocolate. Then place them back onto the tray. Finally, return them to the freezer to set. 15 minutes should be enough. Enjoy!
How to dip: You can dip the chocolate peanut butter balls with either a small fork or a toothpick. Insert the toothpicks into the peanut butter bon bons before placing them in the fridge to harden. That way, they won’t slip off as you’re dipping. If you want to make chocolate buckeye balls, only dip the peanut butter balls ¾ way into the chocolate.
How to use the double broiler method: Place a small heatproof bowl over a saucepan of simmering water (making sure the water isn’t touching the bottom of the bowl). Add your vegan chocolate chips or chopped dairy-free chocolate to the bowl, mixing constantly until melted. To microwave the vegan chocolate, I recommend doing so in 15-20 second increments in a microwave-safe bowl. Be careful not to burn/scorch the chocolate.
Toni’s Recipe Tips and Notes
- Adjust the amount of thickener added: The amount needed will vary based on the type of peanut butter you use and the thickener (powdered sugar vs. flour vs. protein powder).
- To avoid a crumbly dough: Add the powdered sugar (or thickener of your choice) with the peanut butter incrementally. If you accidentally add too much, add a teaspoon at a time of your favorite dairy-free milk until it forms a dough.
- Don’t skip the chilling step: Otherwise, you’ll find that dipping the peanut butter bon bons is a mess as they’ll melt into the hot vegan chocolate.
- To keep the dairy-free chocolate melted for dipping: I recommend using the double boiler method and keeping it over low heat even once the vegan chocolate has melted. That will keep it from hardening while you’re dipping all your no-bake peanut butter balls.
- If the mixture is too soft: It may help to place the bowl in the refrigerator or freezer for 15 to 20 minutes and then roll the crunchy peanut butter balls again. Work quickly, as they’ll soften the longer they sit at room temperature.
- To gift the no-bake peanut butter balls: You could place a few within a cellophane candy bag, biscuit tin, or even mug, tied nicely with a pretty bow. It’s best to use tempered vegan chocolate if you plan to have them at room temperature for extended periods.
FAQs
This is usually because you haven’t added enough thickener (powdered sugar/flour). I recommend starting with one tablespoon and increasing by the teaspoon until you reach the desired consistency.
I prefer to keep them in the refrigerator for the best texture and consistency. I recommend only keeping the chocolate peanut butter balls with Rice Krispies at room temperature if you plan to eat them within one to two days as they’ll soften as they sit.
This recipe is butter-free, and I love it that way. The lower liquid content means I need to rely on less powdered sugar to achieve the correct consistency. If you want to experiment with vegan butter (for richer bonbons), I recommend adding three tablespoons to the mixture and increasing your thickener accordingly.
Absolutely! Try this peanut butter truffles recipe with almond butter, cashew butter, or even make a nut-free version with sunflower seed butter.
Serving Suggestions
Looking for more healthy snacks and treats to keep in rotation or to share with friends?
- Chocolate Dipped: Melt more chocolate for a feast (or some freezer prepping!) of chocolate coconut balls, peanut clusters, chocolate fruit bars, chocolate covered strawberries, or peanut butter cracker sandwiches. Combine a few of those for an extra-special gift-bag or basket, perfect for teacher gifts, co-workers, and gym friends!
- Sweet Treats: Make a dessert tray to share (or keep for yourself!) with chocolate chip banana bites, Biscoff fudge, peanut butter stuffed dates, and/or chocolate crinkle cookies.
- Savory Bites: Switch up the snacking with chai spiced popcorn, easy cucumber bites, or bagel bites.
Storage Instructions
Fridge: Store these vegan chocolate peanut butter balls with rice krispies in an airtight container or zip lock bag in the refrigerator for up to one week.
Freezer: You could also keep them in the freezer for up to three months.
Thaw: When you want to enjoy a chocolate peanut butter ball, allow it to thaw on the counter for just 10-15 minutes.
More Easy Vegan Peanut Butter Recipes:

Vegan Desserts
Peanut Butter Chocolate Bark
Vegan Desserts
Peanut Butter Stuffed Dates
Vegan Desserts
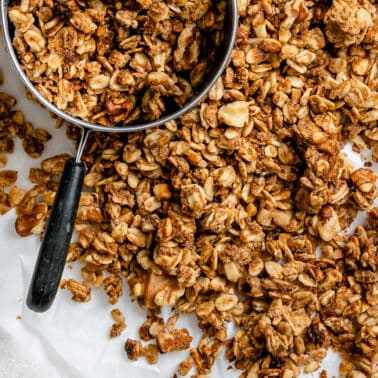
Easy Peanut Butter Granola

Vegan Desserts
Banana and Chocolate Chip Bars (Vegan!)
If you tried this vegan chocolate peanut butter balls with rice krispies recipe or any other recipe on my blog, please leave a 🌟 star rating and let me know how it went in the 📝 comments below. Thanks!
Photos by Alfonso Revilla
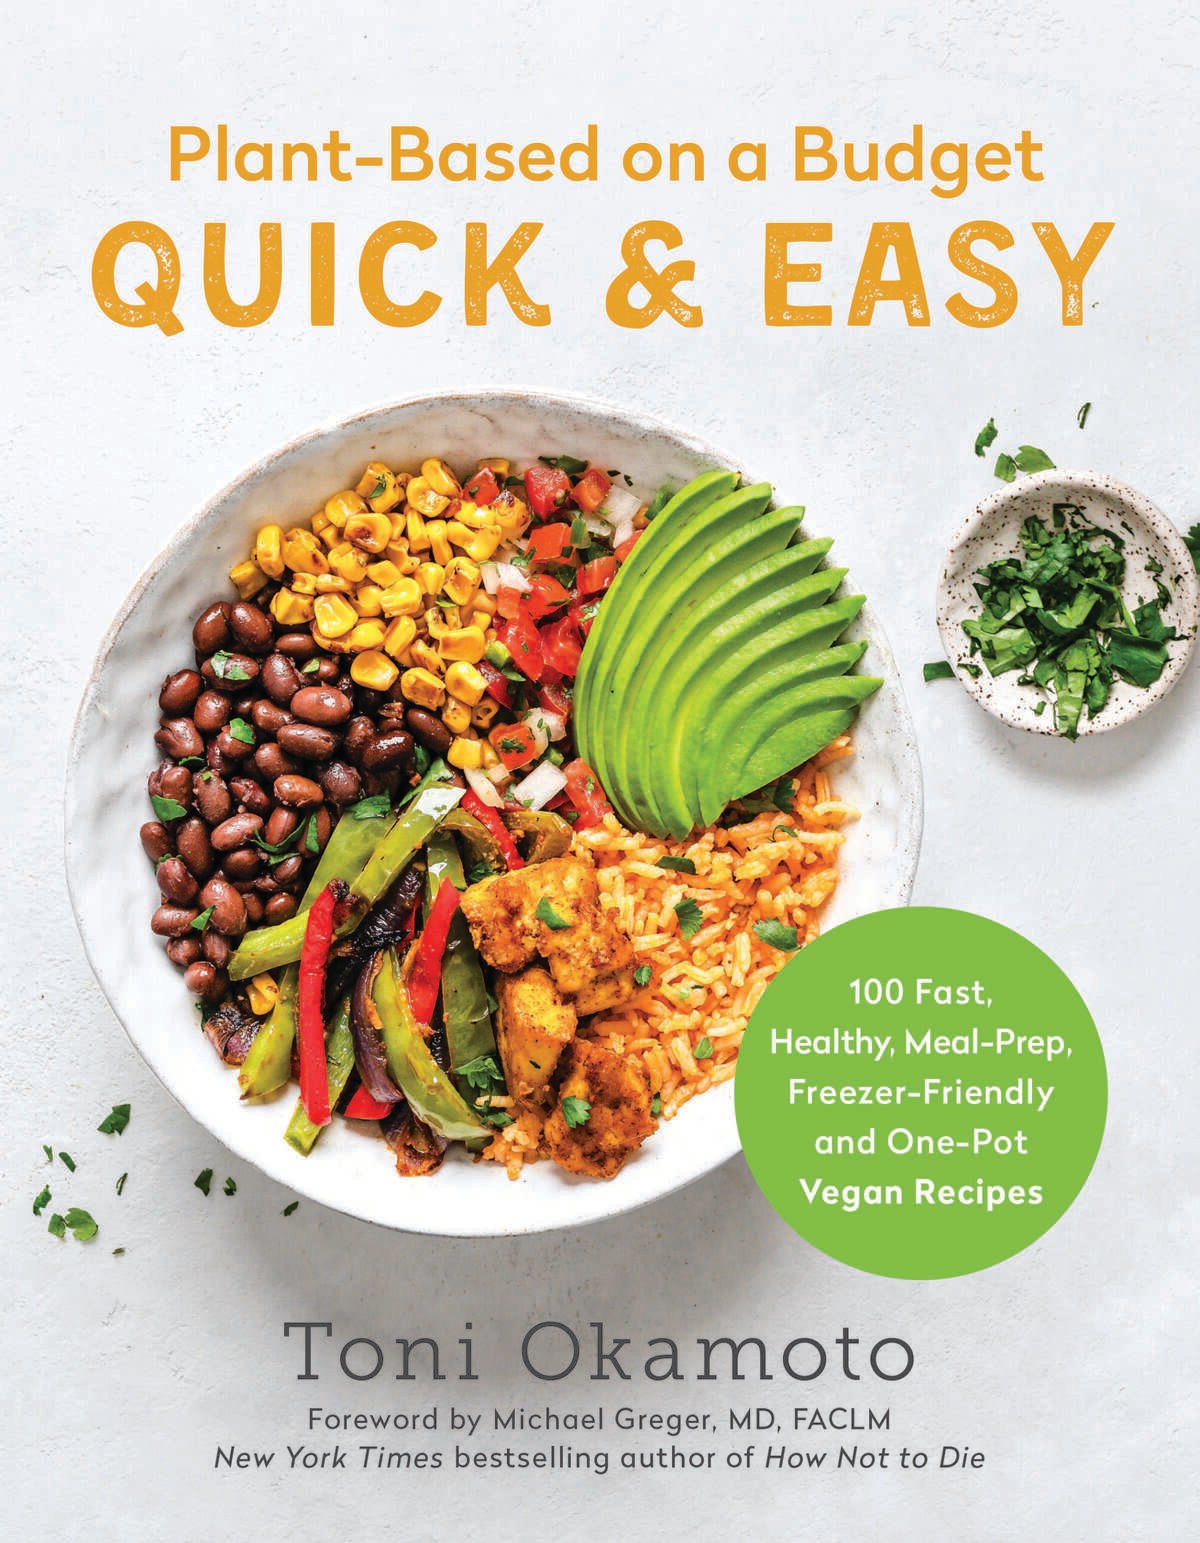

If you’re loving my recipes and would like a more comprehensive resource, check out my cookbooks!
Vegan No-Bake Chocolate Peanut Butter Balls With Rice Krispies (Peanut Butter Bon Bons)
Want to save this recipe?
Video
Ingredients
- ¾ cup of creamy peanut butter smooth or chunky
- 1 cup of puffed rice cereal
- 2 Tablespoons of powdered sugar
- 1 ½ cup of vegan semisweet chocolate chips
Instructions
- Combine the peanut butter, sugar, and rice crispies in a bowl.

- Using a small cookie scoop or melon baller), scoop the mixture into small balls and put on a cookie tray lined with wax or parchment paper. Put the tray in the freezer until the balls harden, about 15 minutes.
- Melt the chocolate.
- Dip the frozen peanut butter bonbons into the melted chocolate and put them back onto the wax paper and return to the freezer. Allow them to freeze, about another 15 minutes. Put in an airtight container or a bag and leave in the fridge.


Notes
- Vanilla extract: Use natural vanilla extract for the best flavor. Just a few drops will enhance the flavor of these peanut butter bon bons.
- Sea salt: If the peanut butter you use is unsalted, you may want to add a pinch to enhance the flavors. You can also sprinkle each vegan chocolate peanut butter truffle with a bit of flaky sea salt. They’ll look beautiful, have a little crunch, and taste great!
- Graham crackers: Instead of using puffed rice cereal, you could create peanut butter balls with graham crackers.
- Peanut butter protein balls: Instead of the powdered sugar or flours mentioned above, you could thicken the peanut butter mixture with your favorite plain or vanilla protein powder. The chocolate peanut butter protein balls make for an excellent pre or post-workout snack!

![completed EASY Chocolate Depression Cake [Wacky Cake] sliced against a white surface](https://plantbasedonabudget.com/wp-content/uploads/2023/01/36-Crazy-Cake-Plant-Based-on-a-Budget-1-2-378x378.jpg)


you indicate this recipe yields 12 bonbons, but don’t state how many per serving. you provide nutritional info but it is useless without the servings pp info.
Sorry for the confusion! The nutritional info shows the information for 1 bonbon if you split the recipe into 12 bonbons 🙂 Hope that helps and hope you enjoy the recipe!
Hi! Is the nutrition info for one piece?
If you make 12, that is correct!
These were EXCELLENT! Made as a dessert for lunch with friends and everyone raved about them! I just wish my chocolate was not so thick after melting (did keep it over the heat) as it just made them a little harder to work with. I used Enjoy Life chips. I think I have read you can add a little coconut oil to thin it? Five stars
So glad you enjoyed these sweet treats!
Planning on using all natural pbutter but yours looks thicker. Is the all natural ok or will they be a sticky mess? Planning on making them tomorrow! thank you
Hi! We recommend using creamy butter; smooth or chunky for these vegan peanut butter truffles. Avoid natural peanut butter where oils have separated and are sitting at the top of the jar as the consistency will throw it off. Hope you enjoy them 🙂
Nice texture and flavor, made them smaller using a tsp to measure out.
thanks for sharing
I love that mini version! So glad you enjoyed them!
I love how easy these are to make, their versatility to add/change ingredients (though they are perfect as is!) and above all, how delicious they are!
Agreed! So many ways to enjoy these bite sized treats!